Arduino Mini CNC Machine

To be honest: in the beginning I had no idea that there is such a thing like CNC machines. CNC stands for “Computer Numerical Control” and there are a ton of different machines out there ranging from 3 up to 5 axis types. But at the moment I realized that I could plan and build things virtually and let the machine do the ultra tiny precicion work repetivly, excited me for further projects. Mmmhhhh delicous repeatability and precision 😉 so I wanted to build my own.
The main goal was to build a cheap, Arduino based machine with easy to access components and to explore the world of mechanics as a designer (Im not an engineer… 😉 ).
CNC mechanics adventure #1 – The fail
It took me quit so time to get this machine done. In the beginning I build a prototype and did a lot of investigation work in mechanics a I never really build something that should be that precise to make sense.
Long story short: my first attempt failed misserably 😉 It wasnt stable enough and the friction of the rails was too high (also too far away from the driving axis) so the table wasnt able to move conistently on both sides. For this distance of the rails the threaded rod is way too “woobly”. And as I dont wanted to spend too much money on the components (expensive leadscrew <-> cheap threadedrod) I needed to work on a solution to this problem.
I tried to build the first prototype completly by hand. I dont say its not possible to cut wood so accurate as it needs to be for such a precision machine but I was not able to do it… 😉
So in a nutshell the things I learned from this fail:
- Place the main driving rod in the middle (between the rails) or have to symmetrical driving rods
- Use spring locking washers
- Since the machine uses very cheap components it cant be that big (threaded rod is not accurate enough)
- Lasercut the pieces 😉
CNC mechanics adventure #2
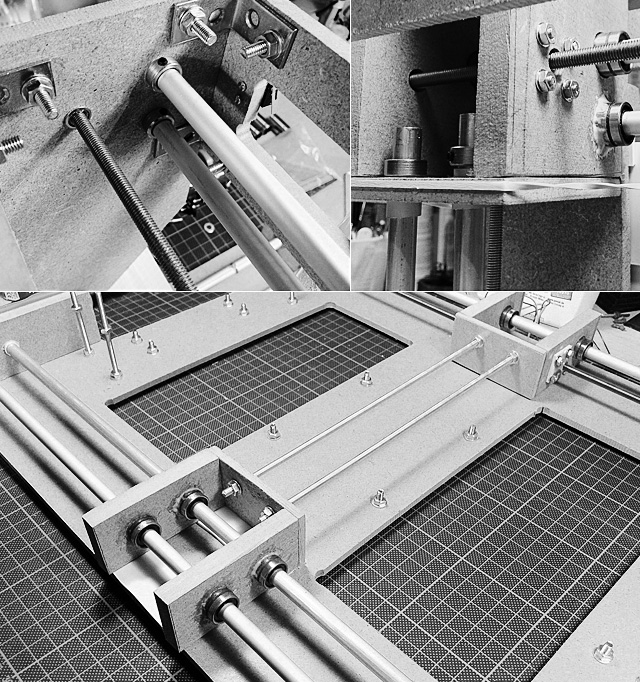
So I had to rethink the whole structure. I made the rails much narrower and got 4 linear roll bearings for each side and placed the driving rod in the middle. This made the whole structure far more stable.

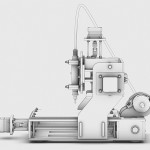
Also the gantry construction got smaller and more rigid. I designed the gantry for a flexible shaft of a dremel tool. The dremel itself should be placed on the backside of the machine above the electronics.


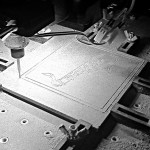
Furthermore I thought since I build the entire machine out of wood: it has to be more accurate. I found a local FabLab where I was able to lasercut all the pieces out of 5mm MDF. That was a damn fine expierience seeing the machine produce the pieces with accurate insaness. 😀
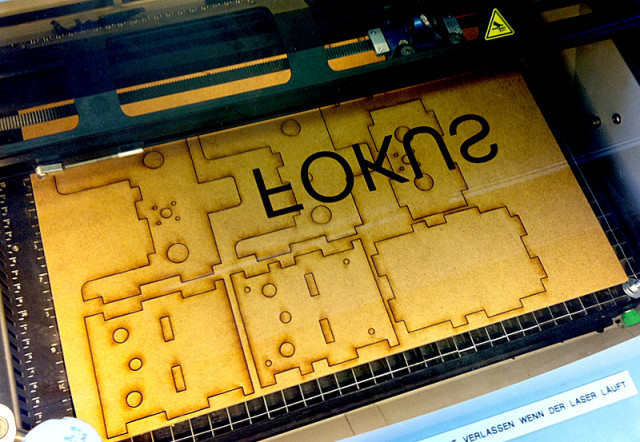
I needed some versions of some of the pieces because I realised sometimes that things do not work in reality as they easily do in a CAD software but finally I did the assembly:
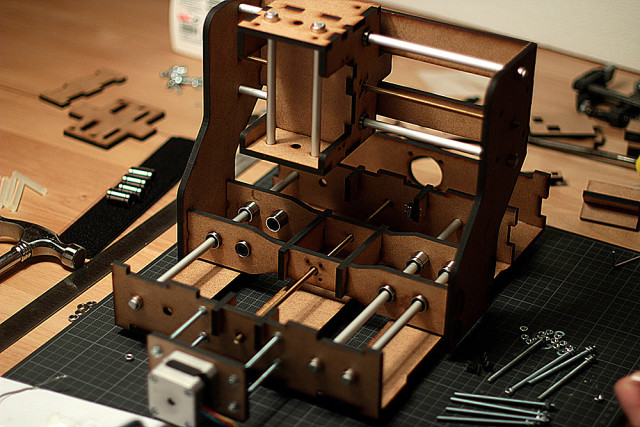
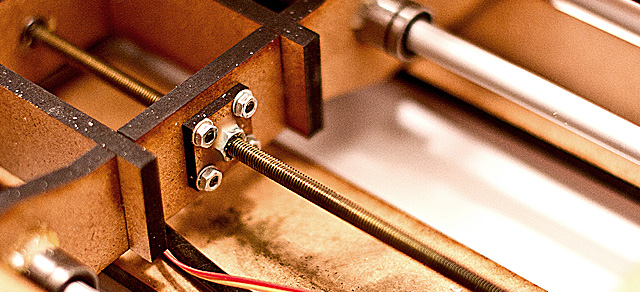
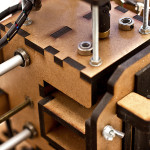
I used LM12UU linear roll bearings (which I glued onto the MDF – I know, thats not very maintance friendly…) and 12mm alumunium rods for all axes. The main driving rods are 5mm very simple threadedrods. All the threaded rods are hold by a cheap small ball bearing that I glued onto the wood.
They completly assembled machine:
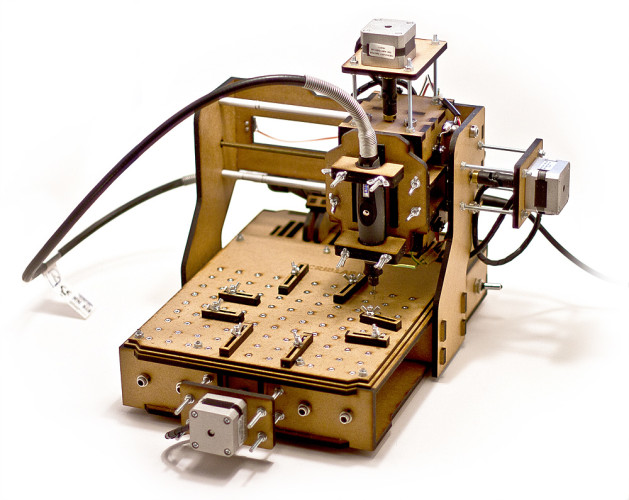
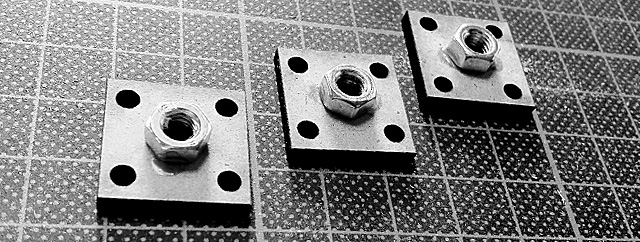
The driving rod is attached to the moving frame with a simple 5mm nut that is glued (I used Pattex StabilitExpress) onto a piece of wood. This construction is then screwed to the frame which should be moved by the rod.
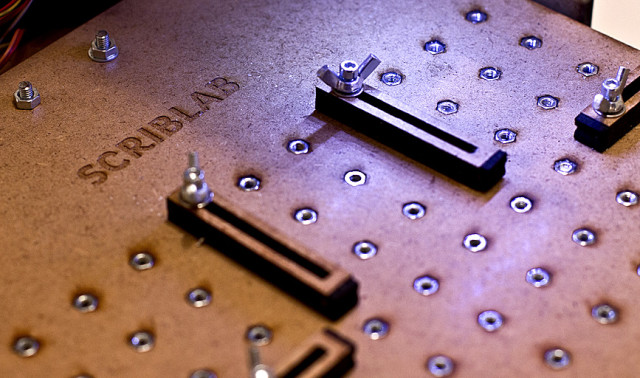
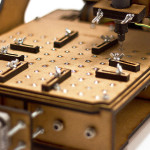
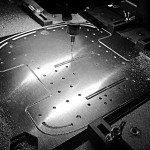
The first version of the build area was just a flat surface. I realised that there needs to be a solution to hold the workpiece in place. I created a piece of wood with a few nuts placed evenly spaced across the surface. That way I was able to screw “holder” in place where they hold the workpiece in place. The nuts are glued in the holes just with superglue. That isnt that great since the screws easily pop out of its position.
The Electronics
The whole controller hardware is build around an Arduino UNO with 3 EasyStepper Driver boards to controll the steppers.
- Arduino UNO
- 3x EasyStepper Driver
- Nema 17 Steppers
- Switches
Pretty simple setup. Im not an expert regarding the current that is drawn from the motors. They get pretty hot on longer opperations but I thing this is normal?! Anyway, it works. 😉 Furthermore the EasyStepper driver get hot during opperation. Thats why I placed a little fan behind them to cool them a little bit.
I placed end switches on each of the axes to controll and zero each axis before any cutting opperation.
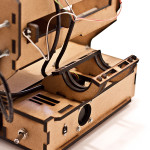
Overall the placement of the electronics is not very good since a lot of dust from the working area gets inside. Especially when working with plastics the plastic melts on top of the EasySteppers… yummy. The inside is a mess so I dont show it here … 😀
The Software
Since I really wanted to understand this whole CNC thing I was eager to make all from scratch. I wrote the firmware, G-Code sender, illustrator and Softimage exporter by my own. Furthermore: I like to know the whole code so Im able to implement new features easier. Yes, also to find bugs easier… that I created by myself… 😀
Im a big fan of beautyful interfaces and since there is no beautyful interface software for CNC machines I wrote and designed my own in processing.

Working with the machine
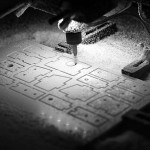
The machine does its job. Since the whole construction is made ot of wood and my little knowledge of rigid machine construction only working with soft materials like soft wood, plastic or wax is usefull.
Enjoy some workpieces:
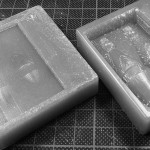
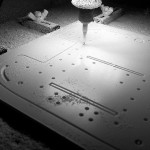

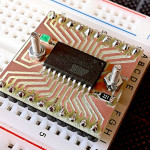
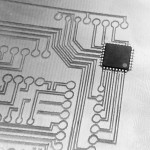
I tried aluminium but it took very long and in the end the holding mechanism broke due to the very strong vibration the occures because of the needed speed of the Dremel tool. Furthermore engraving a PCB does work but it is very painfull to do and the success rate is pretty low (as you can see on the images: larger PCB are not accurate enough; smaller ones do work).
Of course there are a lot of things that can be improved for the next version. Anyway: I learned a lot from this project and Im happy that I tried and build it by my own. 🙂
Further reading
Pingback: Arduino Mood Lamp / LED Cube | Electronics Scriblab